Metal Clay Artist Magazine's mission is to share, exchange and develop ideas; promote education; inspire creativity; and increase appreciation for the work of metal clay artists worldwide. We feature step-by-step projects, articles, guides, tips, techniques, artist profiles and other valuable information about metal clays and mixed media. Our international focus includes content, subscribers and advertisers from around the world.
Thursday, July 12, 2012
Call for Entries
Now Accepting Calendar Submissions for The Art and Design of Metal Clay Jewelry 2013
Deadline: Aug. 15, 2012
Release date: Late - October 2012
We are seeking images to feature in the next annual calendar, The Art and Design of Metal Clay Jewelry 2013. In addition to including jewelry as in the past, this year ALL Metal Clay forms will be included - necklaces, rings, bracelets, earrings, brooches, vessels, objects and other items will be considered. Unique and diverse design styles and techniques are desired. Metal Clay should be the predominant material and all types and brands of Metal Clay will be considered, but other media - resin, gems, metals, enamel, and more may be incorporated into the design. High digital images will be accepted by mail or e-mail:
Christine Norton
c/o Calendar Submission 2013
13754 Knight Court, Gainesville, VA 20155
E-mail: gagecalendar2013@gmail.com
Artwork submitted must represent work that is unique and original in design. New unpublished/unseen work is preferred. Group shots or individual pictures will be accepted. Limit 3 entries, no more than 2 shots per entry. Please don't send actual pieces. Professional photo quality is a MUST. Please consider the fact that viewers will only see your photo, not your original work, so clear, uncluttered photos with an accurate representation will be priority for the selection process. Images should be 300 dpi, in tiff, jpg or psd format with no compression. The image size should be no smaller than 5". However ONLY large format photos 8 1/2 x 11" can be considered for the prominent cover position.
Artwork for inclusion will be selected based on:
- Design
- Innovation
- Craftsmanship
- High degree of excitement
- Unique use of metal clay and degree of challenge
Hint: The above is a great checklist for submissions
Artists retain copyright of their work and receive a free copy of the calendar if selected. Each calendar page measures 8.5” x 11” and measures 11” x 17” when opened.
Please include the following information with your submission. Missing information may forfeit your position in the calendar: (Please consider over 300 photos arrive for review)
1. Name
2. Address
3. Website or e-mail (indicate if this information should be included on the calendar)
4. Title of piece
5. Materials used
6. Dimensions in millimeters
7. Brief Description of process and/or motivation to how it was conceived. An interesting, well written statement is encouraged, 50 words or less. (This information will be published so put your best foot forward. Entries may be edited.)
8. File name
9. Has your file been retouched?
10. Is your file 300 dpi?
Please direct all inquiries to: gagecalendar2013@gmail.com
To see a sample of last year’s calendar go to: http://tinyurl.com/3cbn4o
Tuesday, June 26, 2012
Design Contest Winners: Metal Clay Plus
We were happily surprised to see the nearly 200 entries for the Metal Clay Plus Contest. We saw pieces with polymer clay, resin, enamels, fibers, ceramics, wood,etc. All the pieces were beautiful and very innovative.
Thank You to our contest sponsor, PMC Connection and to CEO Jennifer Roberts for her support. Also a big thank you to the judges, Lora Hart, Celie Fago and Joy Funnell.
We also want to thank all the wonderful artists who submitted images for the contest for taking this opportunity to share your art with all of us.
After the judges carefully scored the images the winners were selected and are as follow.
HONORABLE MENTION
Congratulations to all !!!
Thank You to our contest sponsor, PMC Connection and to CEO Jennifer Roberts for her support. Also a big thank you to the judges, Lora Hart, Celie Fago and Joy Funnell.
We also want to thank all the wonderful artists who submitted images for the contest for taking this opportunity to share your art with all of us.
After the judges carefully scored the images the winners were selected and are as follow.
FIRST PLACE
Kimberly Nogueira
SECOND PLACE
Noortje Meijerink
| Speedy bird ©Noortje Meijerink Porcelain clay and copper clay |
THIRD PLACE
Liz Hall
![]() |
| Inner Works Pendant ©Liz Hall Fine silver clay, Polymer Clay, Fine silver wire, Glitter, Iridescent powders, Liquid polymer. |
HONORABLE MENTION
Milica Bubanja
![]() |
| Vintage Fabric Silver Clay Ring 2 ©Milica Bubanja |
Congratulations to all !!!
Labels:
Bronze,
Celie Fago,
ceramic,
Copper,
Fabric,
jewelry,
Joy Funnell,
Kimberly Nogueira,
Liz Hall,
Lora Hart,
Metal Clay Artist Magazine,
Metal Clay Contest,
Milica Bubanja,
Noortje Meijerink,
Resin,
Wood
Saturday, June 16, 2012
PMC Conference 2012
The last PMC Conference will take place next week. Yes, this is the last conference and I am sad about it. I attended my first conference in 2010 and it was an amazing experience, I was able to finally meet so many talented artists that I have admired their work for a long time.
![]() |
My traveling companion was the amazing Vickie Hallmark, I was so thankful she was with me since I am terrified about airplanes. I am sorry Vickie had to deal with my excessive talking , you may think it was because I was nervous but NO this is my normal way of being. ;o)
The Conference is not only a place to see demos by incredible artists and listen to great lectures, the conference is also the best time to connect and socialize with so many people who comes from so many places. People that maybe you only know from social networking sites like Facebook. This is a great time for you to talk and make friends, to share and to be inspired.
If you are coming to the conference I sure hope I can meet you. I will go again with the best traveling companion, my friend Vickie Hallmark.
Be ready to have lots of fun and make great memories !!
See you there !
See you there !
Love,
Lorena Angulo
Lorena Angulo
Sunday, March 18, 2012
Truer Words Have Never Been Spoken
I have grand plans for future blog posts that delve into the many ways polymer clay and metal clay intersect. There is so much to explore: how artists use both types of clay in mixed-media designs, as well as how polymer clay is such a versatile tool for creating shapes and textures out of metal clay.
I recently taught an introduction to copper clay class to parents and kids. Some of the children were as young as 6. I really didn't know what to expect from the kids, but they all did an amazing job! Unlike many adults, who approach new mediums a bit hesitantly, the kids aren't plagued by creative doubts. Each one told me with confidence that she is an artist.
Ella, age 7, is particularly talented with polymer clay. She makes miniature accessories for her toys and all sorts of other very detailed creations. I tried to explain that she shouldn't touch her very metal clay very much to prevent it from drying out and that it is different that the types of clay she is used to working with. I didn't feel very successful since Ella is very tactile and every time I turned around, she was rolling the clay between her hands as she debated her next move.
Yet on the ride home, when Ella's mom asked her what she had learned in class, Ella responded
"I learned that each type of clay has its own attitude."
How true! What type of attitude does your clay have? Do the different brands and various formulas speak to you in different voices? I think it would be fun to assign each one a persona - after all, we spend a lot of time with them! Please leave a comment and have a wonderful day!
- Cindy Morris, gogoshebogo design
I recently taught an introduction to copper clay class to parents and kids. Some of the children were as young as 6. I really didn't know what to expect from the kids, but they all did an amazing job! Unlike many adults, who approach new mediums a bit hesitantly, the kids aren't plagued by creative doubts. Each one told me with confidence that she is an artist.
Ella, age 7, is particularly talented with polymer clay. She makes miniature accessories for her toys and all sorts of other very detailed creations. I tried to explain that she shouldn't touch her very metal clay very much to prevent it from drying out and that it is different that the types of clay she is used to working with. I didn't feel very successful since Ella is very tactile and every time I turned around, she was rolling the clay between her hands as she debated her next move.
Yet on the ride home, when Ella's mom asked her what she had learned in class, Ella responded
"I learned that each type of clay has its own attitude."
How true! What type of attitude does your clay have? Do the different brands and various formulas speak to you in different voices? I think it would be fun to assign each one a persona - after all, we spend a lot of time with them! Please leave a comment and have a wonderful day!
- Cindy Morris, gogoshebogo design
Monday, March 5, 2012
Kiln Maintenance - Relay Replacement on a Paragon SC-2 Kiln
The day was bound to come when my Paragon SC-2 kiln would need some maintenance. I got a bit of warning that there was trouble coming when I started to hear a whining noise after the cycle had completed (after the regular beeping completion alarm). Eventually, I got the whine during the cycle, turning on and off as the relays clicked. When I called Paragon service, they suggested it might be a relay nearing failure, so I ordered a replacement to have at the ready. Then I decided to replace it immediately, as I read stories of the relay failure leaving the kiln full on to maximum temperatures. No melted silver for me, please!
The relay is the part that opens and closes, giving a clicking sound, to allow electricity to flow to the kiln heating elements. By turning the elements on and off in varying proportions, the kiln can adjust to any temperature. Relays have a limited lifetime, with only so many clicks in them. Failure is guaranteed, eventually. The failure may be either in the open or closed state. If open, the element fails to heat. If closed, the element can't turn off. For larger kilns with more than one element, losing a relay can be somewhat compensated for by the computer brain and the other elements. But with only one element on these small kilns, there's a potential melt down risk, with a total loss of glass or metal work inside the kiln. That's a risk I decided to avoid, thanking the kiln gods for the early warning.
The relay arrived with no instructions, so I started a web search to find out how to do it. The Paragon kiln instruction manuals are all online, including the SC-2 manual. The manual has detailed instructions for replacing the relay, with plenty of photos. If you're a visual learner, you may prefer the video demos available at Cherry Heaven. In either case, be sure to unplug your kiln before starting any repairs. As well as relay replacement, there are instructions on both sites for thermocouple and controller replacement, as well as lots of other helpful details such as programming instructions. Read more about relays in kilns on the excellent Paragon blog.
After all this research, I decided to make my own slideshow/video (a learning process in itself), and recruited my son to take photos for me during the ten minute procedure. Perhaps it will convince you that this is a simple process that all kiln owners can manage on their own.
Saturday, February 18, 2012
Metal Clay Artists are Setting Trends!
In the worlds of fashion and art, it is sometimes impossible to tell who inspired whom, or who is copying whom! The fashion industry has very little copyright protection. This forces fashion designers to constantly innovate and make their pieces unique and hard to replicate, or to build their brands so that even if knock-offs are available for less, their target markets will stay loyal.
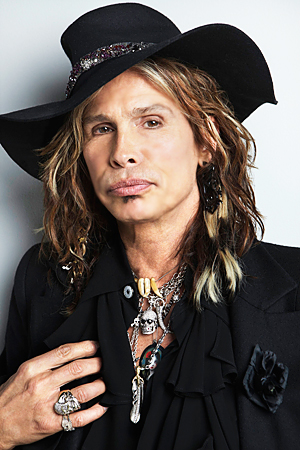
Although I'm a blue jeans and hoodie kind of girl, I find it really interesting to watch the trends . For example, feather jewelry and hair adornments are not new, yet feather accessories have definitely had a recent upswing in popularity. Why? Most likely celebrities like Steven Tyler had something to do with it.
If I didn't know better, I would have thought these were handmade from metal clay. Leaves were one of the first textures I wanted to impress into my metal clay. I'm not alone - pretty much every beginner's metal clay book features a leaf project! Handmade metal clay components featuring organic shapes and patterns are widely available and very popular on sites such as Etsy. This represents real income for real people, so while a part of me is sad to see "mainstream" industry capitalize on their efforts, another part of me must say:
Congratulations metal clay artists! While you might not agree that imitation is the sincerest form of flattery, you must admit that metal clay is having a direct impact on jewelry trends. It is a milestone worth noting!
~ Cindy Morris, gogoshebogo design
Although I'm a blue jeans and hoodie kind of girl, I find it really interesting to watch the trends . For example, feather jewelry and hair adornments are not new, yet feather accessories have definitely had a recent upswing in popularity. Why? Most likely celebrities like Steven Tyler had something to do with it.
Personally, I find his rings to be way more interesting than his feathers, but I digress.
So how does this relate to metal clay artists? Well, TierraCast®, an American manufacturer of pewter jewelry components, recently released a new line of buttons featuring leaf and shell patterns.
Congratulations metal clay artists! While you might not agree that imitation is the sincerest form of flattery, you must admit that metal clay is having a direct impact on jewelry trends. It is a milestone worth noting!
~ Cindy Morris, gogoshebogo design
Sunday, February 5, 2012
Metal Clay Design Competition
Start your year by challenging yourself and enter this wonderful competition organized by Metal Clay Artist Magazine and sponsored by USA-based PMC Connection.
The theme for the competition is "Metal Clay Plus...." You can use any type of metal clay and another non-metal material to create your piece. This can be a great opportunity to start experimenting and playing with materials that you may have not use before.
Design requirements:
Metal clay needs to be feature prominently in the design. You can use one or more non-metal materials like resin, glass, polymer clay, enamel, cement, paperclay, fabric, found objects, etc.
Example:
Judging Criteria:
Pieces will be judged based on their workmanship, originality, presentation, creativity and effective use of materials.
Artist may enter up to 3 pieces.
Eligibility:
Any independent artist who neither is employed by a metal clay manufacturer nor is a staff member at either PMC Connection or Metal Clay Artist Magazine may enter his or her work into the contest.
Entries:
All designs entered in this competition must be original. Winning pieces from other competitions are not eligible to be entered. Each entry must be accompanied by a description of the design, inspiration, construction technique and materials used.
Photos:
Images must be .jpg labeled using the following format:
Artist Name_Name of piece(optional)_brief description_country.jpg
(example, Jessica Wong_Morning Mist_PMC Pearl Bracelet_Japan.jpg).
Image dimensions: minimum 4" x 6"
resolution: minimum 300 dpi
Send photos to contest@metalclayartistmag.com
with the subject line "MCAM Design Competition"
Awards:
1st Price $300 gift certificate from PMC Connection
2nd Price $200 gift certificate from PMC Connection
3rd Price $100 gift certificate from PMC Connection
Winning pieces will be feature in a PMC Connection ad and an article in MCAM.
Entry Deadline:
Pieces must be submitted by 11:59 Eastern Time on February 29th, 2012.
Judging:
Winners will be determined by a panel of jurors
Availability of winning entries:
Winning entries will be showcased in Metal Clay Artist Magazine and must be available to be photographed professionally (if necessary).
You still have time to make something and share your creativity with us !
The theme for the competition is "Metal Clay Plus...." You can use any type of metal clay and another non-metal material to create your piece. This can be a great opportunity to start experimenting and playing with materials that you may have not use before.
Design requirements:
Metal clay needs to be feature prominently in the design. You can use one or more non-metal materials like resin, glass, polymer clay, enamel, cement, paperclay, fabric, found objects, etc.
Example:
![]() |
| ©2011 Lorena Angulo FastFire Bronzclay, Creative paperclay cabochon with colored pencils. |
Judging Criteria:
Pieces will be judged based on their workmanship, originality, presentation, creativity and effective use of materials.
Artist may enter up to 3 pieces.
Eligibility:
Any independent artist who neither is employed by a metal clay manufacturer nor is a staff member at either PMC Connection or Metal Clay Artist Magazine may enter his or her work into the contest.
Entries:
All designs entered in this competition must be original. Winning pieces from other competitions are not eligible to be entered. Each entry must be accompanied by a description of the design, inspiration, construction technique and materials used.
Photos:
Images must be .jpg labeled using the following format:
Artist Name_Name of piece(optional)_brief description_country.jpg
(example, Jessica Wong_Morning Mist_PMC Pearl Bracelet_Japan.jpg).
Image dimensions: minimum 4" x 6"
resolution: minimum 300 dpi
Send photos to contest@metalclayartistmag.com
with the subject line "MCAM Design Competition"
Awards:
1st Price $300 gift certificate from PMC Connection
2nd Price $200 gift certificate from PMC Connection
3rd Price $100 gift certificate from PMC Connection
Winning pieces will be feature in a PMC Connection ad and an article in MCAM.
Entry Deadline:
Pieces must be submitted by 11:59 Eastern Time on February 29th, 2012.
Judging:
Winners will be determined by a panel of jurors
Availability of winning entries:
Winning entries will be showcased in Metal Clay Artist Magazine and must be available to be photographed professionally (if necessary).
You still have time to make something and share your creativity with us !
Firing pans for base metal clays: how to choose!
Hi bloglandia! I'm Cindy, and I'm a (base) metal clay addict. I have my firing system pretty well worked out these days. It wasn't always like this, though. I remember being very unsure about how to fire bronze and copper. I did a lot of homework, but it much of the information available seemed contradictory. Book learning could only take me so far - I had to test the methods myself!
Since base metal clays need to be fired in activated carbon, you need a container to hold the carbon in. But what kind is best? Many of you probably thought you'd never have to worry about this, since you work in silver. However, now that sterling silver clay is becoming popular, you very well might need a firing vessel!
I can't claim to be an expert, but I can share what I've learned from direct experience using all the popular firing vessels - ceramic, fiberboard, fiber blanket and stainless steel. Here are what I believe are the pros and cons of each. If you've had different experiences, please leave a comment below so we can all learn together!
Ceramic firing vessels
Pros - durable, available in variety of sizes, won't "contaminate" the kiln (more on this later), can be used with a lid or without, transmits heat well.
Cons - susceptible to thermal shock, relatively expensive.
Fiberboard firing vessels
Pros - won't "contaminate" the kiln (more on this later), can be used with a lid or without, transmits heat well. Thermal shock isn't a concern.
Cons - not as durable, deteriorates after a few firings. Last I checked, was only available in a pretty small size.
Fiber blanket firing vessels
(For this method, you pin a piece of fiber blanket together with steel t-pins to form a firing box.)
Pros - relatively inexpensive, transmits heat well.
Cons - difficult to find materials, requires construction, flimsy, can be difficult to get in/out of kiln, can't withstand the recommended firing schedules for all brands of clay (I had one disintegrate entirely after a single BRONZclay firing - but the pieces sintered just fine at least!)
Stainless steel firing vessels
Pros - durable, cheap, can be used on a camp stove or gas burner to burn out the clay binder.
Cons - relatively poor conductor of heat, might leave kiln dirty.
Here is where the issue of kiln "contamination" comes in. Some stainless steel containers (in my experience, all of the square steel firing boxes - which are actually restaurant food pans, if you want to source them cheaper! - and most stainless steel mixing bowls) will turn black during firing. Black flakes and dust fall off the pan/bowl into the kiln.
My kiln is right next to my Shop-Vac in the basement, so this isn't much of a concern for me. Five seconds of vacuuming and the dust is gone. I put contamination in quotes because the dust is just that - dust. It is easy to clean up and is not ruining your kiln. However it is possible to avoid the dirty part. It seems that there are different grades of steel and some of these don't flake off during firing. Every steel bowl that I have purchased from thrift stores has not flaked, yet every one that I've purchased new has. Go figure.
For the past few months I've used the faster-firing schedule Hadar Jacobson shared on her blog. It really does work with all brands of clay (or at least all the brands I've tried!). This firing schedule is two-phase, with the first phase completed on a gas stove. For this reason, I now only use stainless steel firing boxes and bowls. For awhile I used the lid from my fiberboard box as a lid on the steel bowl, but then I discovered that a aluminum foil pie plate with a few holes punched in it worked just as well (for the gas-stove step only - don't use aluminum in your kiln!). The photo above is my Pocket Rocket stove with a bowl full of metal clay creations hiding under that lid - and my supervisor Indigo in the background.
So there you have it - many options for firing your metal clay creations in carbon! My advice is to keep is simple and use a stainless steel bowl. More money for clay that way! Enjoy your weekend all! ~ Cindy Morris, gogoshebogo design
Since base metal clays need to be fired in activated carbon, you need a container to hold the carbon in. But what kind is best? Many of you probably thought you'd never have to worry about this, since you work in silver. However, now that sterling silver clay is becoming popular, you very well might need a firing vessel!
I can't claim to be an expert, but I can share what I've learned from direct experience using all the popular firing vessels - ceramic, fiberboard, fiber blanket and stainless steel. Here are what I believe are the pros and cons of each. If you've had different experiences, please leave a comment below so we can all learn together!
Ceramic firing vessels
Pros - durable, available in variety of sizes, won't "contaminate" the kiln (more on this later), can be used with a lid or without, transmits heat well.
Cons - susceptible to thermal shock, relatively expensive.
Fiberboard firing vessels
Pros - won't "contaminate" the kiln (more on this later), can be used with a lid or without, transmits heat well. Thermal shock isn't a concern.
Cons - not as durable, deteriorates after a few firings. Last I checked, was only available in a pretty small size.
Fiber blanket firing vessels
(For this method, you pin a piece of fiber blanket together with steel t-pins to form a firing box.)
Pros - relatively inexpensive, transmits heat well.
Cons - difficult to find materials, requires construction, flimsy, can be difficult to get in/out of kiln, can't withstand the recommended firing schedules for all brands of clay (I had one disintegrate entirely after a single BRONZclay firing - but the pieces sintered just fine at least!)
Stainless steel firing vessels
Pros - durable, cheap, can be used on a camp stove or gas burner to burn out the clay binder.
Cons - relatively poor conductor of heat, might leave kiln dirty.
Here is where the issue of kiln "contamination" comes in. Some stainless steel containers (in my experience, all of the square steel firing boxes - which are actually restaurant food pans, if you want to source them cheaper! - and most stainless steel mixing bowls) will turn black during firing. Black flakes and dust fall off the pan/bowl into the kiln.
My kiln is right next to my Shop-Vac in the basement, so this isn't much of a concern for me. Five seconds of vacuuming and the dust is gone. I put contamination in quotes because the dust is just that - dust. It is easy to clean up and is not ruining your kiln. However it is possible to avoid the dirty part. It seems that there are different grades of steel and some of these don't flake off during firing. Every steel bowl that I have purchased from thrift stores has not flaked, yet every one that I've purchased new has. Go figure.
For the past few months I've used the faster-firing schedule Hadar Jacobson shared on her blog. It really does work with all brands of clay (or at least all the brands I've tried!). This firing schedule is two-phase, with the first phase completed on a gas stove. For this reason, I now only use stainless steel firing boxes and bowls. For awhile I used the lid from my fiberboard box as a lid on the steel bowl, but then I discovered that a aluminum foil pie plate with a few holes punched in it worked just as well (for the gas-stove step only - don't use aluminum in your kiln!). The photo above is my Pocket Rocket stove with a bowl full of metal clay creations hiding under that lid - and my supervisor Indigo in the background.
So there you have it - many options for firing your metal clay creations in carbon! My advice is to keep is simple and use a stainless steel bowl. More money for clay that way! Enjoy your weekend all! ~ Cindy Morris, gogoshebogo design
Tuesday, January 24, 2012
You never know where you'll find inspiration
The piece of crystalline titanium came to me in the mail. Sent carefully packaged by Holly Gage, it was nestled in a Newman's Own ginger mints tin. As soon as I took it out I was not only delighted by the titanium, but I was struck by the pretty art on the tin. I squirreled it away.
Now I wanted to design something to do justice to that sparkling titanium. I sketched out several versions of a necklace, and decided it would be cool to cut a circle out of that tin and make it into a cabochon to use in the piece.
So this was July, and I had my sketch ready to go—sort of. I started what I call "circling". This is what I do when I'm not 100% certain about carrying something out. I circle, figuratively speaking. I circled and thought about it and never did make it. Something was holding me back, I don't know what it was...
Enter Lora Hart and her 4 a Month challenge for 2012. This group on Flickr is created around the concept of making 4 pieces a month—anything you'd like—but you must make four of them. You can choose your theme and process.
Coincidentally, I also had just completed a "mentorial" with Lora. This is the "creative coaching" service she provides through her web site and Etsy shop. We discussed my being in a stuck spot with my jewelry business. Lora provided much food for thought, and encouraged me to explore and try new things.
The 4 a Month challenge, the mentorial, the tin…inspiration! What if I made that pendant I had sketched out, and 3 more pieces using parts of the tin? Almost right away, I pictured all 4 pieces. I signed up for the 4 a Month group and got to work.
The first piece was the titanium pendant. For this, I cut out a circle from the tin, dapped it into a dome, and set it like a cabochon in a bezel in a bolo above the pendant. I named this piece "Holly's Necklace" in honor of Holly Gage, who I'm sure had no idea she was providing a boatload of inspiration when she tucked that titanium into that tin.
Next came "Dragon Cuff"—because of course I HAD to do something with that dragon!
After that I made "Rainbow Drops" earrings. Last, "Window Box Pendant".
It was a lot of fun and very satisfying to complete a series like this. I am looking forward to continuing on with 4 a Month each month throughout the year.
Thank you to Holly and to Lora for getting me to stop circling and to move forward. You never know where you will find inspiration!
~ Evelyn Pelati Dombkowski
![]() |
| I took this photo after I started cutting it. |
Now I wanted to design something to do justice to that sparkling titanium. I sketched out several versions of a necklace, and decided it would be cool to cut a circle out of that tin and make it into a cabochon to use in the piece.
![]() |
| I liked the bolo idea best. |
So this was July, and I had my sketch ready to go—sort of. I started what I call "circling". This is what I do when I'm not 100% certain about carrying something out. I circle, figuratively speaking. I circled and thought about it and never did make it. Something was holding me back, I don't know what it was...
Coincidentally, I also had just completed a "mentorial" with Lora. This is the "creative coaching" service she provides through her web site and Etsy shop. We discussed my being in a stuck spot with my jewelry business. Lora provided much food for thought, and encouraged me to explore and try new things.
The 4 a Month challenge, the mentorial, the tin…inspiration! What if I made that pendant I had sketched out, and 3 more pieces using parts of the tin? Almost right away, I pictured all 4 pieces. I signed up for the 4 a Month group and got to work.
The first piece was the titanium pendant. For this, I cut out a circle from the tin, dapped it into a dome, and set it like a cabochon in a bezel in a bolo above the pendant. I named this piece "Holly's Necklace" in honor of Holly Gage, who I'm sure had no idea she was providing a boatload of inspiration when she tucked that titanium into that tin.
Next came "Dragon Cuff"—because of course I HAD to do something with that dragon!
After that I made "Rainbow Drops" earrings. Last, "Window Box Pendant".
It was a lot of fun and very satisfying to complete a series like this. I am looking forward to continuing on with 4 a Month each month throughout the year.
Thank you to Holly and to Lora for getting me to stop circling and to move forward. You never know where you will find inspiration!
Tuesday, January 17, 2012
Are you lost in cyberspace ??
I have talked about the importance of crediting your images the right way every time you post a picture of your work in any site in the Internet. This not only gives you the rights and credit of your work but also makes your images have an identity.
I talked about this topic in this post: Do you credit your art work the right way?
Crediting your images is very important but it is also not the only thing you have to do when you post your images on line, tagging your pictures is extremely IMPORTANT !!
You will be lost in cyberspace if you do not tag your images.
Some people may think this is too hard or they may not want to do the extra job of writing tags for their images, but I am telling you, if you do not do it then I do not see the point in posting your images without tags. Tags help you to make your pictures visible to others when they do search in the Internet.
Tagging an image is simple, tags are words that will describe what is in your picture; for example:
Tags: Lorena Angulo, Ring, Silver, PMC Sterling, Sterling, Metal Clay, Roses, flowers, leaves, jewelry, textures, hand sculpted
Every word in this list will make my image visible when someone writes a "key" word in any search page.
I hope you will take the extra time when you see a space that says "tags" or "labels" to write tags in your images the next time you post a picture, this will help you and help others find your work.
Happy Tagging !!!!
Keep Playing, keep creating !
Lorena Angulo
p.s. I almost forgot !! I need to tag my blog post too ! ;o)
I talked about this topic in this post: Do you credit your art work the right way?
Crediting your images is very important but it is also not the only thing you have to do when you post your images on line, tagging your pictures is extremely IMPORTANT !!
You will be lost in cyberspace if you do not tag your images.
Some people may think this is too hard or they may not want to do the extra job of writing tags for their images, but I am telling you, if you do not do it then I do not see the point in posting your images without tags. Tags help you to make your pictures visible to others when they do search in the Internet.
Tagging an image is simple, tags are words that will describe what is in your picture; for example:
![]() |
| ROSAS ©2011 Lorena Angulo Sterling PMC Photo: Speedy Peacock |
Every word in this list will make my image visible when someone writes a "key" word in any search page.
I hope you will take the extra time when you see a space that says "tags" or "labels" to write tags in your images the next time you post a picture, this will help you and help others find your work.
Happy Tagging !!!!
Keep Playing, keep creating !
Lorena Angulo
p.s. I almost forgot !! I need to tag my blog post too ! ;o)
Sunday, December 18, 2011
BREAKING NEWS!
Metal Clay Artists Magazine is proud to announce that starting in the new year, the digital subscriptions and back issues will migrate to the Zinio (January 2012) and Nook Newsstand (February 2012) platforms. Being offered through these two platforms will greatly enhance the magazine's offerings and provide a better way to explore and enjoy the magazine. Customers will be able to view the magazine on their iPad, Mac, PC, Android (V2.2 and higher), Nook and Kindle Fire.
Stay tuned for additional details in the new year !
Tuesday, December 13, 2011
25 grams of PMC Sterling
I was very happy to have the opportunity to play with the new PMC Sterling back in November. Finally we can have a metal clay that it is stronger and can me mark as .925 silver (sterling).
I got a package of 25 grams and I got into my studio to make some pieces with it. The working time for this type of clay is longer and it gives you the flexibility to not worry about the clay drying too fast while you are working with it. The color of the clay is darker and the texture is great and easy to work with.
My plan was to make a ring, earrings and a pendant. The first piece I made was the ring, I hand roll a long snake and wrap it around a mandrel to form the band. The joining of the joints was easy to make and I just added some water to smooth the connections.
I decided to go 3.5 sizes bigger than the size I need it for the ring. I do not use any inserts in my ring when I fired it, I believe it is better to let the clay shrink all the way.
Carving is another thing I wanted to try with this clay since most of my work has carving in it. I was surprise to see how smooth and easy carving was with this type of clay. The carving went perfect and I saved my carving scraps to add some texture in my pendant later on.
Since the clay has a longer working time before it gets dry, I knew hand sculpting will be easy and great to do. I hand sculpted a rose to add to my ring and it was perfect for sculpting.
I let the rose dry first before I added it to the center of the band, this way you will not deform the rose. Adding the rose was easy by using water and fresh clay to join the rose to the band. I do not like to use paste for this, I prefer to use fresh clay instead of paste. I continue to hand formed little rose buds around the center rose and some leaves.
For the earrings I wanted to use sterling jump rings and fire them in place. I embedded them in the earrings with fresh clay and hand formed flowers and leaves. In the center of the flowers I attached a CZ Garnet.
For the pendant I play with textures and added my carving scraps on top of the heart with water. I carved and hand formed roses for the front and back of the piece. I always like to add something extra on the back of my pieces.
My firing schedule was different from the package because my pieces were thicker than 3mm. For the open shelf firing I fast ramp to 1000F and hold there for 40 minutes. I let the pieces cool down completely inside the kiln before I took them out to do the second firing.
For the second firing I added a coat of activated carbon at the bottom of the steel pot and added my pieces in one layer. I covered them with more activated carbon and closed the pot with the lid. I fast ramp the kiln to 1500F and hold there for 45 minutes. I also let the pieces cool down inside the kiln when the firing was over.
This is how the pieces look like when they are fired and out of the kiln. A white matte color and they do not have any oxidation or black coloring in them, not even in the sterling jump ring.
I brush them with a brass brush and soapy water, added LOS Gel patina and finally I polished them in a magnetic tumbler.
I want to continue experimenting and I am going to fire the clay to a longer time, maybe close to 2 hours. I will let you know how this goes and if the size of the ring shrinks more if I add more time to the firing.
I am sure you will all like to work with this clay and the best of all is that the price is very similar to PMC3.
Keep Playing, Keep Creating !!
Love,
Lorena Angulo
I got a package of 25 grams and I got into my studio to make some pieces with it. The working time for this type of clay is longer and it gives you the flexibility to not worry about the clay drying too fast while you are working with it. The color of the clay is darker and the texture is great and easy to work with.
My plan was to make a ring, earrings and a pendant. The first piece I made was the ring, I hand roll a long snake and wrap it around a mandrel to form the band. The joining of the joints was easy to make and I just added some water to smooth the connections.
I decided to go 3.5 sizes bigger than the size I need it for the ring. I do not use any inserts in my ring when I fired it, I believe it is better to let the clay shrink all the way.
Carving is another thing I wanted to try with this clay since most of my work has carving in it. I was surprise to see how smooth and easy carving was with this type of clay. The carving went perfect and I saved my carving scraps to add some texture in my pendant later on.
Since the clay has a longer working time before it gets dry, I knew hand sculpting will be easy and great to do. I hand sculpted a rose to add to my ring and it was perfect for sculpting.
I let the rose dry first before I added it to the center of the band, this way you will not deform the rose. Adding the rose was easy by using water and fresh clay to join the rose to the band. I do not like to use paste for this, I prefer to use fresh clay instead of paste. I continue to hand formed little rose buds around the center rose and some leaves.
For the earrings I wanted to use sterling jump rings and fire them in place. I embedded them in the earrings with fresh clay and hand formed flowers and leaves. In the center of the flowers I attached a CZ Garnet.
For the pendant I play with textures and added my carving scraps on top of the heart with water. I carved and hand formed roses for the front and back of the piece. I always like to add something extra on the back of my pieces.
My firing schedule was different from the package because my pieces were thicker than 3mm. For the open shelf firing I fast ramp to 1000F and hold there for 40 minutes. I let the pieces cool down completely inside the kiln before I took them out to do the second firing.
For the second firing I added a coat of activated carbon at the bottom of the steel pot and added my pieces in one layer. I covered them with more activated carbon and closed the pot with the lid. I fast ramp the kiln to 1500F and hold there for 45 minutes. I also let the pieces cool down inside the kiln when the firing was over.
This is how the pieces look like when they are fired and out of the kiln. A white matte color and they do not have any oxidation or black coloring in them, not even in the sterling jump ring.
I brush them with a brass brush and soapy water, added LOS Gel patina and finally I polished them in a magnetic tumbler.
![]() |
| EL CORAZON ©2011 Lorena Angulo PMC Sterling Photo: Speedy Peacock |
![]() |
| FLOR ©2011 Lorena Angulo PMC Sterling, CZ Hessonite Garnet, Pearls Photo: Speedy Peacock |
![]() |
| ROSAS ©2011 Lorena Angulo PMC Sterling Photo: Speedy Peacock |
I want to continue experimenting and I am going to fire the clay to a longer time, maybe close to 2 hours. I will let you know how this goes and if the size of the ring shrinks more if I add more time to the firing.
I am sure you will all like to work with this clay and the best of all is that the price is very similar to PMC3.
Keep Playing, Keep Creating !!
Love,
Lorena Angulo
Labels:
art,
earrings,
flowers,
jewelry,
kiln,
Lorena Angulo,
metal clay,
Metal Clay Artist Magazine,
milagro hearts,
pendant,
PMC,
PMC Sterling,
ring,
roses,
sacred hearts,
Silver,
Sterling
Monday, November 14, 2011
Kathleen Nowak Tucci: A wonderful innovative artist.
If you have the latest issue of Metal Clay Artist Magazine, you have seen the wonderful front cover piece made by this incredible artist, Kathleen Nowak Tucci.
I remember the first time I saw her work, it was magical to see how she was able to transform recycled rubber bicycle and motorcycle inner tubes into amazing pieces of wearable art. I had the pleasure to interview Kathleen to introduce her and her work to our blog followers.
How did you started creating your work and where?
I knew that I was an artist even as a little girl, but I was also good at Math and Science so I attended college and majored in Computer Science and minored in Biology. My schedule never allowed time for any college level art classes however I always had some kind of art project that I would work on in my limited free time.
I remember the first time I saw her work, it was magical to see how she was able to transform recycled rubber bicycle and motorcycle inner tubes into amazing pieces of wearable art. I had the pleasure to interview Kathleen to introduce her and her work to our blog followers.
How did you started creating your work and where?
I knew that I was an artist even as a little girl, but I was also good at Math and Science so I attended college and majored in Computer Science and minored in Biology. My schedule never allowed time for any college level art classes however I always had some kind of art project that I would work on in my limited free time.
For the rubber jewelry, I initially began using industrial
rubber products such as o-rings to construct jewelry. Then I got an idea that needed thin rubber,
the only rubber products that I could find were too thick. I ended up going to a bicycle shop and asked
them for the old inner tubes off the bicycles that they repaired. My initial idea was a flop and the tubes sat
in my studio for months. I hated to
throw them away so one day I just started to “play” with the rubber. I soon realized that it was a great medium to
work with, flexible, easy to cut and to manipulate. One of the best things about the rubber from
the inner tubes is that it is so lightweight. I can make large, dramatic pieces with little
weight.
What inspires you?
Most anything visual is an inspiration to me. I have been inspired by architecture,
paintings, sculpture, nature and other artists.
There is nothing more fun for me than to visit a museum or art gallery
and be inspired by the great talents of other artists both past and
present. Somehow all the visual
information stews in my brain and then comes out reconfigured in my own original
creations. I am fortunate to always have
ideas and only wish that there were more time to make everything.
Why do you use recycled materials?
I really just stumbled upon making work in
recycled materials. I freely admit that
it was the properties of the material of the recycled rubber that first drew me
to create architectural jewelry in rubber.
As my designs progressed and I began to acquire cohesion of vision, the
Gulf Coast was hammered with the Gulf Oil Spill. I was struck by the devastation of the event,
its numbing anguish and our own human interaction with Nature, for good or
ill. I began to see the relevance of my
work as an Eco-artist and Eco-designer and am now proud to call myself an
eco-designer.
How did you know about metal clay and why did you started
including it in your work?
I have worked in many mediums including, ceramic clay,
polymer clay, silversmithing, and most
painting mediums. Since I have always
read art books and magazines, I must have learned about it though one of those
resources. The editor of MCAM Jeannette
Froese LeBlanc and I meet at an Architectural Ceramics Class by Peter King held
in Pensacola FL, in the Spring of 2001.
We talk to each other about this new medium and how interesting it
seemed. By that fall we signed up to
take a class together in silver metal clay.
Because we had both had previous experience in ceramic clay, working
metal clay was very intuitive for both of us and we realized that it was an
amazing medium. Though we live a great
distance from each other, every time we were able to visit, it seemed that we
always made some time to work in metal clay together. So eleven years after our first taste of
metal clay, Jeannette owns MCAM and I combined the metal clay with my rubber
jewelry and am on the cover of the magazine!
It still amazes me and I am so proud of Jeannette!
Do you have any advice to a new beginner?
My advice to a
beginner would be to start off working in one of the base metal clays. Take a class with an experienced teacher to
skip over all the trial and much error of working in a new medium. Also don’t expect a masterpiece the first
time you work in any medium. Even those
of us that have much experience, have many pieces and designs that are not
brilliant.
That being said, metal clay is a medium that even a beginner
can create some really outstanding work.
To advance in metal clay, learn other metal working
techniques such as riveting, sawing, soldering, etc.
Can you share with us what has been one of the best moments
in your career and why?
Wow, I have had so many amazing things happen in my
career. I have been an artist for almost
30 years now and it seems publicity has always come my way. The first time I saw my work in a gallery was
exciting as was my first feature in a newspaper.
Having my rubber jewelry, on the cover, of the controversial
‘Oil Spill Issue” , Vogue Italia. August 2010, certainly has to rank as a very
exciting moment in my career. Vogue
Italia is considered by many as the top fashion magazine in the world. The photography was by Steven Meisel a top
international photographer. Being the
first Eco-artist on the cover of a major fashion magazine is still pretty
surreal.
A very close second is getting to see the MCAM cover, that
my work is featured on, for the first time at the Smithsonian Craft2Wear
Show. What an exciting day!
Can you talk to us about your experience doing the
Smithsonian Show ?
The Smithsonian Craft
Show, is a beautifully run show put on
by the Smithsonian Women’s Committee.
It is definitely the big league!
I was one of 120 artists juried in out of 1300+ entries. Because I normally do not do retail shows, it
was really a tremendous amount of work to get ready for the show, set up for
the show and to be at the booth for five days.
I still don’t know if I have fully recovered. My favorite part of the show was getting to
see all the other amazing art and to be able to meet and talk to other artists
that I have admired “from afar”. It
really is the best of the best and it was very exciting to be a part of it.
I was one of forty artists invited to show at the October
Smithsonian Craft2Wear Show. All artists
have previously been juried into the Smithsonian Show and it was quite an honor
to receive the invitation. This show was
much shorter, three days, and it felt much more manageable. Once again, I had so much fun seeing people
interact with my work and because it was a smaller show, I was able interact with other artists and their work.
One more exciting thing that happened at the show was that I
was the only artist asked to speak at the lecture that was given during the
show. So many exciting adventures!
I want to thank Kathleen for taking her time to give me this interview and to be so generous to share her story with all of us.
To see more of her amazing work click on the following links:
Monday, October 10, 2011
More Vocabulary of Chains
Linda Kaye-Moses' The Vocabulary of Chains (in the latest issue of Metal Clay Artist Magazine, vol. 2, issue 4) and Joy Funnell's Summertime Bling chain necklace project (MCAM's last issue, vol. 2, issue 3) will have you thinking about chains and metal clay in a new light.
Coincidentally, I just completed a course about chain-making with Leslie Hartwell at Metalwerx, in Waltham, MA. Inspired by Linda's and Joy's articles and Leslie's class, I thought I'd share some more ideas for expanding your own chain vocabulary.
Often, we spend so much time and effort working on a piece that when it is ready to be paired with a chain, we grab the most convenient commercially-made one and we're done.
Integrating the chain and pendant requires a little pre-planning. Think about the chain, too, when you are designing your piece. What kind of chain will complement the pendant? Will the finished piece look unified? How will the chain connect with the pendant? Also, think about other things, such as proportion—should the chain be large and chunky? Or thin and delicate?
If fabricating a custom chain is not your thing, there are ways to modify commercially-made chain that might be a solution for you.
Consider altering chain by methods like hammering, cutting apart, or applying patina.
For example; if you have a chain with large, open links—you can rest the edge of a link on your bench block and hammer it. The link can be turned and hammered all the way around, or just partially hammered. A pattern can be created by hammering alternate links or every link. How about hammering just a centerpiece where the pendant will hang?
Chains can be cut apart and the segments re-joined with interspersed beads—or like Linda's project—custom-made metal clay components. Graduated size chains can be linked into one, unified look. You can connect multiple strands of chain to single strand sections. How about mixing metals?
Adding a patina to the chain might be just that little extra something to bring the entire piece together with a customized feel.
If you enjoy making more complex work, there are many additional ways to design chains to complement a pendant. You can be daring and fabricate a chain, or a section of chain, from metal clay. Or, you can make your own chain by soldering wire. Several books are available for soldered chain technical information and design inspiration. Here are three that I really like:
• The Complete Metalsmith by Tim McCreight. This book has a wealth of information—so it's a worthwhile addition to your books anyway—but in this case it offers many tips on chain construction, chain styles, clasps and bails.
• Creative Silver Chains by Chantal Lise Saunders. Nice step by step instructions on some interesting designs, plus a very good introductory section with information on materials, techniques and design inspiration.
• Making Silver Chains by Glen F. Waszek is another well-organized book with great step by step instructions and a lot of good lessons for working with silver.
~ Evelyn
Coincidentally, I just completed a course about chain-making with Leslie Hartwell at Metalwerx, in Waltham, MA. Inspired by Linda's and Joy's articles and Leslie's class, I thought I'd share some more ideas for expanding your own chain vocabulary.
Often, we spend so much time and effort working on a piece that when it is ready to be paired with a chain, we grab the most convenient commercially-made one and we're done.
Integrating the chain and pendant requires a little pre-planning. Think about the chain, too, when you are designing your piece. What kind of chain will complement the pendant? Will the finished piece look unified? How will the chain connect with the pendant? Also, think about other things, such as proportion—should the chain be large and chunky? Or thin and delicate?
If fabricating a custom chain is not your thing, there are ways to modify commercially-made chain that might be a solution for you.
Consider altering chain by methods like hammering, cutting apart, or applying patina.
![]() |
| Upper left: Altering commercial chain by cutting apart and interspersing with beads, plus adding patina Upper right and bottom photos: custom made chains |
Chains can be cut apart and the segments re-joined with interspersed beads—or like Linda's project—custom-made metal clay components. Graduated size chains can be linked into one, unified look. You can connect multiple strands of chain to single strand sections. How about mixing metals?
Adding a patina to the chain might be just that little extra something to bring the entire piece together with a customized feel.
If you enjoy making more complex work, there are many additional ways to design chains to complement a pendant. You can be daring and fabricate a chain, or a section of chain, from metal clay. Or, you can make your own chain by soldering wire. Several books are available for soldered chain technical information and design inspiration. Here are three that I really like:
• The Complete Metalsmith by Tim McCreight. This book has a wealth of information—so it's a worthwhile addition to your books anyway—but in this case it offers many tips on chain construction, chain styles, clasps and bails.
• Creative Silver Chains by Chantal Lise Saunders. Nice step by step instructions on some interesting designs, plus a very good introductory section with information on materials, techniques and design inspiration.
• Making Silver Chains by Glen F. Waszek is another well-organized book with great step by step instructions and a lot of good lessons for working with silver.
~ Evelyn
Monday, October 3, 2011
Now You See It, Now You Don’t…Transforming Your Workspace
The latest Reader Challenge is to show us your workspace.
We all love to see where other artists work!
MCAM reader, Yvonne Kuennen shares her experience with organizing her space and clearing the clutter…
When you work with metal clay, you tend to fall in love with it because it takes up so little space. It’s extremely portable, and a very small toolbox will hold most of your tools. Many of the basic tools are common things you might find in your kitchen or around the house: miniature rolling pin, cookies cutters, picks, emery boards, brushes, etc. In no time at all the tools multiply; and, before you know it, take over a portion of your house! The other people who share that living space are forced to give it up. It really is unfair—to everyone concerned.
It is a challenge to organize so many tiny tools. You can’t have too many tools or too many beads (everyone knows that)! The question is, what do you let go of?
In my study of Feng Shui I ran across a book entitled Clearing the Clutter. Then I attended a workshop on the same topic. The basic premise for Feng Shui is in the clearing of spaces. The best tip I learned was to create three boxes (or bins) with these labels: donate/repurpose, pitch and keep. The trick for me was getting the boxes to the thrift store or the trash before I got a chance to pull things back out. I kept telling myself, “less is more.” It is so true.
Sort it all out and systematically categorize the things you are sorting through. If anything appears to be taking up too much space, find a bin for it. Be ruthless…is it being used? Selling or donating unused items is the easiest route in making them go away. The cash or credit you receive is such a plus that the pain of letting go is minimized.
Space planning is also no small feat. It requires a good deal of thoughtful planning and engineering. It also requires a high degree of organization. Without organization, you don’t know what get rid of. In my own case, the dining room table became a parking lot for all stages of design and production.
I struggled for months (years to be truthful) to figure out a better order for all these things. I had several different beading rooms, but each one became a cluttered nightmare with no visible tabletop to work on.
VOILA! My husband Michael, the wood artist, built a wall-to-wall bookcase from “stick.” It is five sections from floor to ceiling, made of alder-stained cherry with cupboards beneath each section. Each cupboard now houses the myriad of tools and various pieces of equipment for my trade.
One cupboard has kits for seven students (my maximum for teaching workshops), the next has a tower of drawers to house all the molds I’ve made, a variety of texture tips, cutters and the like. The third holds all my firing equipment in a work bucket. The fourth has all my scrap glass and tools for making the dichroic cabochons. The fifth stands empty—yet to be filled, but that is a good thing since I am not finished. I still have beads to organize (get rid of)? The best organizing tool that I have found for beads are 5.5 x 9 x 1 inch trays with separator black felt bottoms. Some even have tops that snap shut. These trays stack neatly, and once labeled, make it easy to find a particular bead.
Bringing peace into your house by organizing your workspace can be done without a degree in Feng Shui. It is highly recommended to understand the principles of this ancient art of placement and worth any time you can spend studying it. The timing is important because the process is difficult on an emotional level. Several weeks in between “pitches” made it easier for me, and each one was less painful than the first. The art of organizing your workspace is a process, and you have to remember to “trust the process.” What a difference it has made to have a clean dining room table!
With my new organized workspace, I find myself being much more productive .
My head is clear and I find more room to design and plan new projects. In demonstrating my respect for other people’s space, my relationships have improved. I have started cooking again due to the newly cleared dining room table. The kitchen is no longer permanent parking space for the crème brulee torch, torch stand and tumbler!
~ Yvonne Kuennen
Friday, August 26, 2011
I am an Artist and very proud of all my "cakes" !
I have seen a lot of discussions lately about what "Metal Clay" is for some metalsmithing people and I am surprised to see how much misinformation they have about this innovative material.
I understand their lack of knowledge, and those who tried it and said it was a mess, and it does not work. Well, I have some news for you; you did not work with the clay the right way.
I respect everybody's opinion but I think there is a point where we need to be careful in how we talk about people who have chosen to work with metal clay, we can express our thinking without being rude and without insulting.
I have been called lots of names because of my ethnicity but I never thought I will be called "names" because of the medium or material I choose to create some of my work.
One of the latest names I saw was "Cake Decorator", people who work with metal clay are consider to be that by some.
I am okay with the name, I LOVE CAKES !!!
Other people feel we are "pretending to BE" metalsmiths.
We are not pretending to be "Anything", we are just people who have chosen to work with Metal Clay and create art. We are not "cake decorators", "metalsmiths", etc. We are just Artists that are open to experiment with new materials and we are always willing to learn new techniques.
I always encourage my students to learn how to solder and fabricate pieces because it will benefit their own metal clay work.
I started my journey in the art by learning metalsmithing, it was my wonderful and talented teacher -Claire Holliday- who introduced me to this novel material, metal clay, that Claire used to create some of her work.
One of Claire's metal clay pieces was featured in the front cover of the Metalsmith magazine, a publication of the Society of North American Goldsmiths.
In 2010 I had a wonderful opportunity to show my work (not exclusively metal clay) to other talented and renowned metalsmith artists, among them, Thomas Mann. Thomas was so intrigued and interested that traded one of his pieces for one of mine.I was honored to do a trade with him !
Another fascinating and mind opening experience that helped me expand my creativity and techniques, was when I had the pleasure to participate in a workshop and lecture by Robert Ebendorf at the Southwest School of Art in San Antonio, Texas.
What I learned from Bob gave me a new dimension to create, incorporating traditional metalsmith fabrication techniques with the distinctive style promoted by Bob's work but keeping my own creative voice and designs.
In case you don't know, Bob was one of the founding members of the Society of North American Goldsmiths and an inductee of the National Metalsmiths Hall of Fame.
During the workshop, when Bob saw one of my hand sculpted copper clay trees of life, he suggested to me to create a piece using what I learned from him and using the tree of life as the center component.
This piece was later featured in the front cover of the Metal Clay Artist Magazine, and many other publications.
I really want to give thanks to a lot of my metalsmiths friends and colleagues that are open to see beyond the material. I have learn a lot from all of you.
Keep learning, keep experimenting, keep creating !
Love,
Lorena Angulo
I understand their lack of knowledge, and those who tried it and said it was a mess, and it does not work. Well, I have some news for you; you did not work with the clay the right way.
I respect everybody's opinion but I think there is a point where we need to be careful in how we talk about people who have chosen to work with metal clay, we can express our thinking without being rude and without insulting.
I have been called lots of names because of my ethnicity but I never thought I will be called "names" because of the medium or material I choose to create some of my work.
One of the latest names I saw was "Cake Decorator", people who work with metal clay are consider to be that by some.
I am okay with the name, I LOVE CAKES !!!
Other people feel we are "pretending to BE" metalsmiths.
We are not pretending to be "Anything", we are just people who have chosen to work with Metal Clay and create art. We are not "cake decorators", "metalsmiths", etc. We are just Artists that are open to experiment with new materials and we are always willing to learn new techniques.
I always encourage my students to learn how to solder and fabricate pieces because it will benefit their own metal clay work.
I started my journey in the art by learning metalsmithing, it was my wonderful and talented teacher -Claire Holliday- who introduced me to this novel material, metal clay, that Claire used to create some of her work.
One of Claire's metal clay pieces was featured in the front cover of the Metalsmith magazine, a publication of the Society of North American Goldsmiths.
![]() |
| Sea Seed No. 1 (Brooch) ©2005 Claire Holliday Fine Silver Photo: Dean Powell |
In 2010 I had a wonderful opportunity to show my work (not exclusively metal clay) to other talented and renowned metalsmith artists, among them, Thomas Mann. Thomas was so intrigued and interested that traded one of his pieces for one of mine.I was honored to do a trade with him !
![]() |
| Thomas visiting my table and looking at my work. |
Another fascinating and mind opening experience that helped me expand my creativity and techniques, was when I had the pleasure to participate in a workshop and lecture by Robert Ebendorf at the Southwest School of Art in San Antonio, Texas.
What I learned from Bob gave me a new dimension to create, incorporating traditional metalsmith fabrication techniques with the distinctive style promoted by Bob's work but keeping my own creative voice and designs.
In case you don't know, Bob was one of the founding members of the Society of North American Goldsmiths and an inductee of the National Metalsmiths Hall of Fame.
During the workshop, when Bob saw one of my hand sculpted copper clay trees of life, he suggested to me to create a piece using what I learned from him and using the tree of life as the center component.
This piece was later featured in the front cover of the Metal Clay Artist Magazine, and many other publications.
I really want to give thanks to a lot of my metalsmiths friends and colleagues that are open to see beyond the material. I have learn a lot from all of you.
Keep learning, keep experimenting, keep creating !
Love,
Lorena Angulo
Subscribe to:
Posts (Atom)