Holly Gage is an extraordinarily talented, creative and innovative jewelry artist and teacher. She’s someone whose work I’ve admired for many years and I’ve always wanted to take one of her classes. I finally got the chance when a spot opened up for her January repoussé effects class.
When creating her art, Holly finds it most satisfying to start with a unique vision seen through her personal lens (camera or eye). So, in order to transform her original photographs and drawings into metal clay jewelry, bringing her artistic vision to life through highly detailed, low relief images in fine silver, she developed a technique that simulates the dimensional relief and intricate detail of the traditional repoussé and chasing silversmithing techniques.
The metal clay jewelry Holly creates with her repoussé effects technique is absolutely stunning, and I was extremely excited about the prospect of learning her technique during this two-day class at her studio, which is located in the beautiful Pennsylvania Dutch Country area around Lancaster, Pennsylvania.
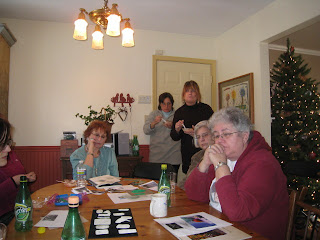
Our class participants spanned a wide range of ages and experience levels, including a talented high school student who was fairly new to metal clay and a number of very experienced metal clay artists and teachers. I really enjoyed meeting all the other students and seeing how differently each of us applied this technique.
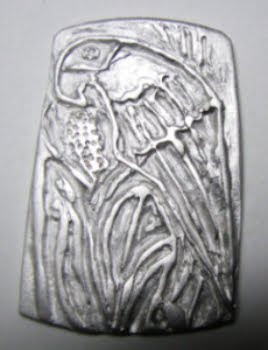
After we introduced ourselves, Holly put us at ease by leading us in a brief relaxation exercise. Next, she inspired us with some of her own exquisite metal clay repoussé pieces. Here are a few examples:

We were shown the photo and the black-and-white photocopy (reduced to slightly larger than the desired finished to allow for the metal clay shrinkage) and the resulting polymer clay mold, which had been created by transferring the image to a thick slab of soft, uncured Sculpey® SuperFlex Bake & Bend™ clay and then pressing, sculpting and manipulating the clay gently and patiently with needle tools, ball-end styluses and other tools to create the basic shapes and relief before curing the mold in a toaster oven. The image was simplified for the mold and only selected details from the photo were pressed into the polymer clay. The fine details were added later directly on the molded metal clay. Seeing how the process evolved from the original, full-sized photo through to the highly detailed, finished pendant provided a very helpful frame of reference prior to starting work on our own pieces.
Holly also explained some of the basic principles of good design, including the importance of choosing primary and secondary focal points, drawing the viewer’s eyes to those focal points, and creating compositions with a good balance of positive and negative space. She showed us how to frame the best shot in our images (similar to the way film directors frame the best shot for each scene in a movie).
Then it was time for us to start creating our molds! First we burnished our images (either the reduced-size photocopies or, for more complex images, simplified pencil tracings onto our polymer clay slabs. Some of us found it quite challenging to control the tool impressions on the very soft, uncured Bake & Bend polymer clay. I’m used to carving hard, cured Premo! Sculpey® polymer clay with micro carving tools, which gives you a much greater degree of precise control. Fortunately, with Holly’s help and guidance, I got the hang of it eventually. The effects that can be achieved by working the very soft, uncured Bake & Bend cannot be achieved by carving cured, rigid polymer clay. The Bake & Bend formula also remains flexible after curing, so that removing metal clay from the mold is much easier than removing it from a rigid, cured polymer mold.
After we created and cured our molds, we each rolled out a sheet of PMC3™ and pressed it into our molds, slowly and systematically, making sure we got a clear impression before unmolding the metal clay. Since the molds are just intended to rough in the design and create the appropriate levels of surface relief, the designs molded into the metal clay are really more of a blank canvas for the detail work. Holly warned us in advance that before they are refined, all metal clay pieces go through what she calls an “ugly stage.” She explained that with this technique, that stage occurs immediately after the metal clay is removed from the mold. Fortunately, that’s also when the real fun starts: adding the details that make the somewhat bland, low-relief images come alive!


Holly showed us a wide range of texturing options, some to be worked on the fresh clay and others to be used on bone dry clay. She also gave us great tips for making the focal points pop, such as attaching separate, dimensional elements and how creating subtle undercuts to give the illusion of greater relief and dimensionality.

It’s hard to believe this was her first time working with either polymer or metal clay!


As students, we were more interested in using this opportunity to learn and perfect the techniques Holly was teaching us than in finishing our pieces by the end of the class, so we all chose to keep working at our own pace and watching Holly’s technique demonstrations and to complete our class pieces after returning home. Holly made all us promise to share pictures of our repoussé effects pieces as soon as we finished ours. Here are some of the other photos she’s received so far:


Very nice article Margaret! And I look forward to seeing your finished piece. As a photographer I have been wanting to take this class forever!
ReplyDeleteThanks, Kim! You'd absolutely love it.
ReplyDeleteGreat !!
ReplyDeleteAll the pieces are amazing !!!
Great article! Haven't fired my piece yet, but I will send you a phot when I do.
ReplyDeleteThanks, Lorena and Linda! Linda, I'm looking forward to seeing your finished piece. You did an awesome job on it!
ReplyDeleteWonderful posting Margaret! Looks like a great class!
ReplyDeleteAs the resident "crazy cat lady" I have to say "OWWW, I WANT THE SNUGGLING CAT PENDANT!" :-)
ReplyDeleteWhat a terrific post - makes me feel like I was there with you! Looks like you all had a lot of fun! And the talent shown in the finished pieces - WOW WOW WOW!!! Everyone seems like such a natural at the technique!
Thanks, Jeannette and Christine! It WAS a great class, and the pieces that everyone made are really impressive!
ReplyDeleteThanks for this overview! I'm dying to take this class someday.
ReplyDeleteHi Vickie, I think you'd really enjoy it!
ReplyDeleteWhat a sweet post! I had such a good time in class and seeing the artistry inside come alive is what it is all about. This is the gift my students give to me... and for that I am very lucky!
ReplyDeleteWhat a wonderful post Margaret. It sure makes me want to take the class. I am too far away in Atlanta though.
ReplyDeleteI love how you showed everyone's pieces and how you expressed your thoughts about the process. You have an excellent way of bringing your thoughts to life on the page. I really appreciate that. It is a gift in and of itself.
Wonderful read.
Lisa Barth
I took the class when Holly came to the UK it was great and I have since made several pieces I love the technique.
ReplyDeleteGreat article with tons of information. Thank you!
ReplyDelete